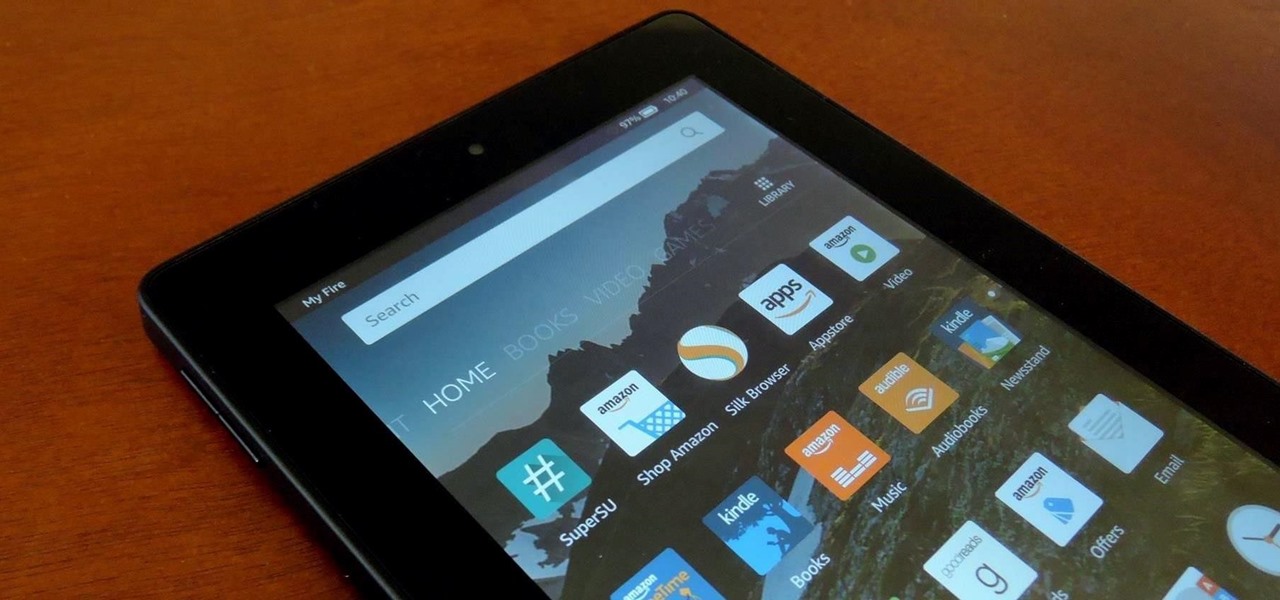

Amazon is slowly trying to gain as much influence in the tech world as it has in the consumer market, and with the Amazon Fire HD 7, they have their eyes set on taking on the "budget tablet" space.
For the amount of money you spend on the Fire HD 7, you get a pretty decent tablet that can easily handle all the normal, everyday tasks you need to get done, like sending emails, taking notes, and even a little light gaming.
However, since Amazon did not use the normal vanilla Android OS, instead opting for their own Fire OS fork, they have the ability to disable a lot of the features we have come to know and love with Android, namely the Google Play Store and core Google apps.
These limitations were a huge deal breaker for me, since I already had hundreds of purchases on my Google account and had no way of accessing them on my Fire HD 7 without rooting. But thanks to XDA user DoLooper, there is a clear and surefire way of rooting the HD 7.
Step 1: Check Which Model You Have
The 2015 model has no proven root method, so only use this guide for the 2014 model. If you are unsure what model you are using, check to see if you have an SD card slot—only the 2015 model comes with one.
Step 2: Back Up!
This is a slightly more complicated process than the average root procedure, so be sure to back up all your internal storage to your computer in case anything goes wrong.
Step 3: Check Which OS Version You Have
Rooting the Fire HD 7 can be kind of tricky depending on your current Fire OS version number. Check by heading into Settings -> About, and if the version is anything above 4.5.3, you will need to downgrade before rooting.
To downgrade to 4.5.3, download the file below. I renamed mine FireOS 4.5.3.bin so it's easier to find in Step 5 of this guide.
Step 4: Make Sure You Have ADB Installed
The downgrade will require you to send some ADB commands from a computer, so be sure to have ADB installed before attempting the process. In this guide, I will be using a Mac, but the same commands will work with any operating system.
Step 5: Downgrade to Fire OS 4.5.3 (Optional)
If you are coming from Fire OS 4.5.4 or above, you will first need to downgrade to 4.5.3, as mentioned above. If you already have 4.5.3 on your Fire HD 7, skip to Step 6.
- Upgrade your Amazon account to be a Developer account.
- Opt your Fire tablet to be eligible for the Fire OS 5 beta.

- Head to Settings -> My Device -> Updates to check for the beta update, then install it.
- Once the update is downloaded and applied to your device, turn off Wi-Fi on your Fire HD 7.
- Enable ADB debugging from the Developer options on your Fire HD 7.
- Plug your Fire HD 7 into your computer.
- Once connected, open up Terminal or a command prompt.
- Input adb reboot recovery, then press Enter.
- Once in Recovery mode, use the volume buttons on your Fire HD 7 to highlight "Apply update from ADB."
- Press the power button on your Fire HD 7 to select it.
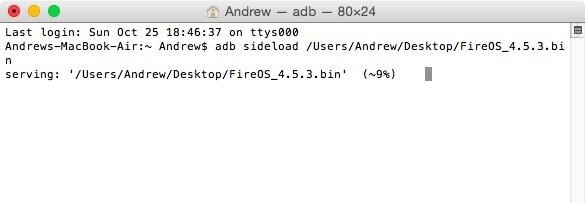
- Back in the Terminal window or command prompt, input adb sideload /LocationOf/FireOS_4.5.3.bin (make sure you use the location of the .bin file downloaded above; you can see what mine looks like in the screenshot below), then press Enter to begin the downgrade process.
- After the downgrade is completed, select Wipe data/factory reset on your Fire HD 7's screen.
- Then choose Reboot system.
- Do not disconnect your HD 7 from your computer yet. The reboot will take longer than normal, which is expected, but once it boots up, select your language, skip registration, and be sure to keep Wi-Fi disabled, which prevents automatic updates from installing.
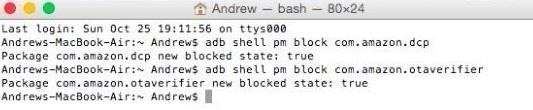
Step 6: Block OTAs on Your Fire HD 7
If you didn't need to downgrade, make sure to turn off Wi-Fi on your Fire HD 7 and enable USB debugging, then connect your device to your computer and open a command prompt window (see numbers 4-7 in Step 5 above).
With a new Terminal window or command prompt window open, enter the following commands one by one to block OTAs (over-the-air updates) from upgrading your device:
- adb shell pm block com.amazon.dcp
- adb shell pm block com.amazon.otaverifier
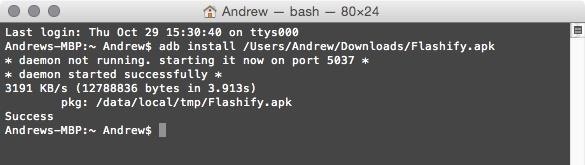
Step 7: Install KingRoot & Flashify
Now it's time to install the tools you are going to use to root. Download the KingRoot and Flashify APKs linked below onto your computer.
Then install them on your Fire HD 7 with the following commands:
- adb install location_of_Kingroot.apk
- adb install location_of_Flashify.apk
Step 8: Root Your Fire HD 7
All that is left to do is to turn on Wi-Fi on your Fire HD 7, open KingRoot, and press "Root." There is a slight chance you won't get root on the first try, so if that happens, reboot your device and try again.
Note: don't disconnect your tablet from your computer just yet. You'll still need to be connected for Step 9 and 10 below.
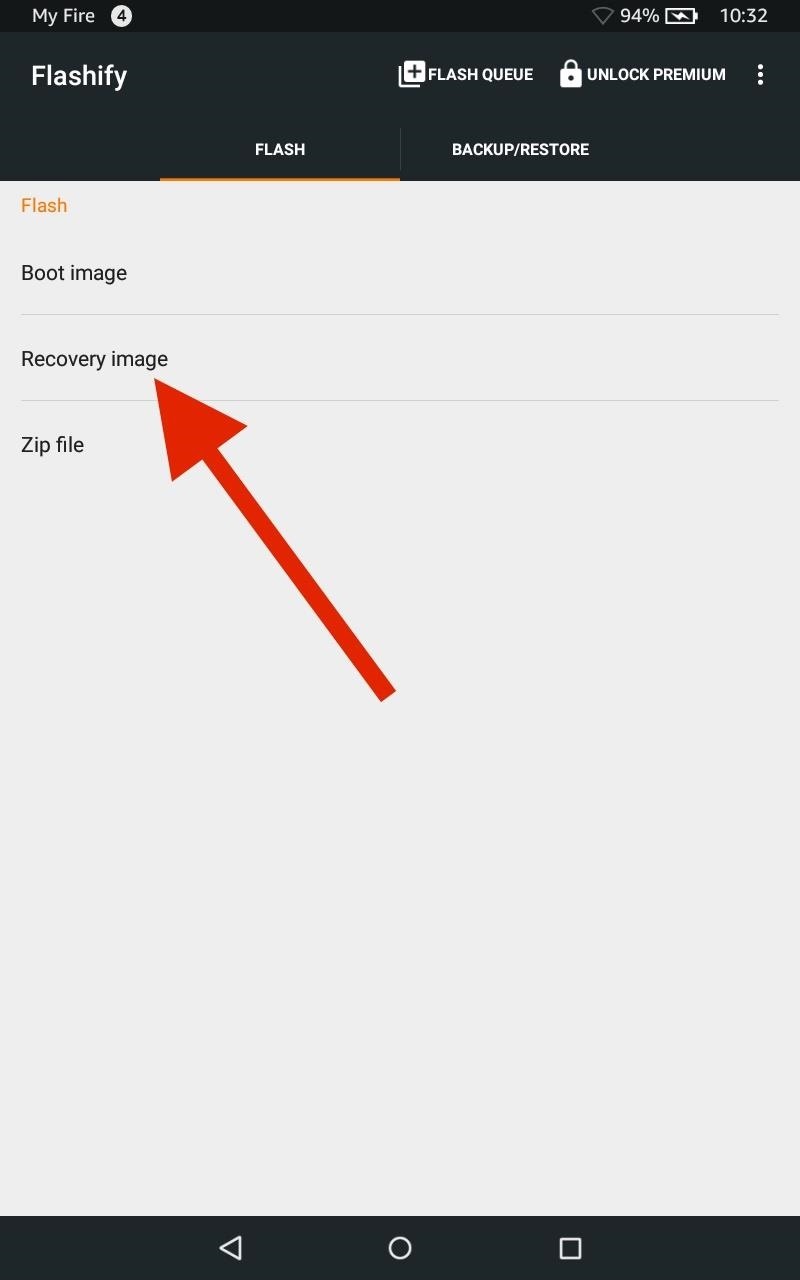
Step 9: Install TWRP
Now that you have root, using your Fire HD 7's internet browser, install the latest version of TWRP (a custom recovery) for the Fire HD 7 using the link below.
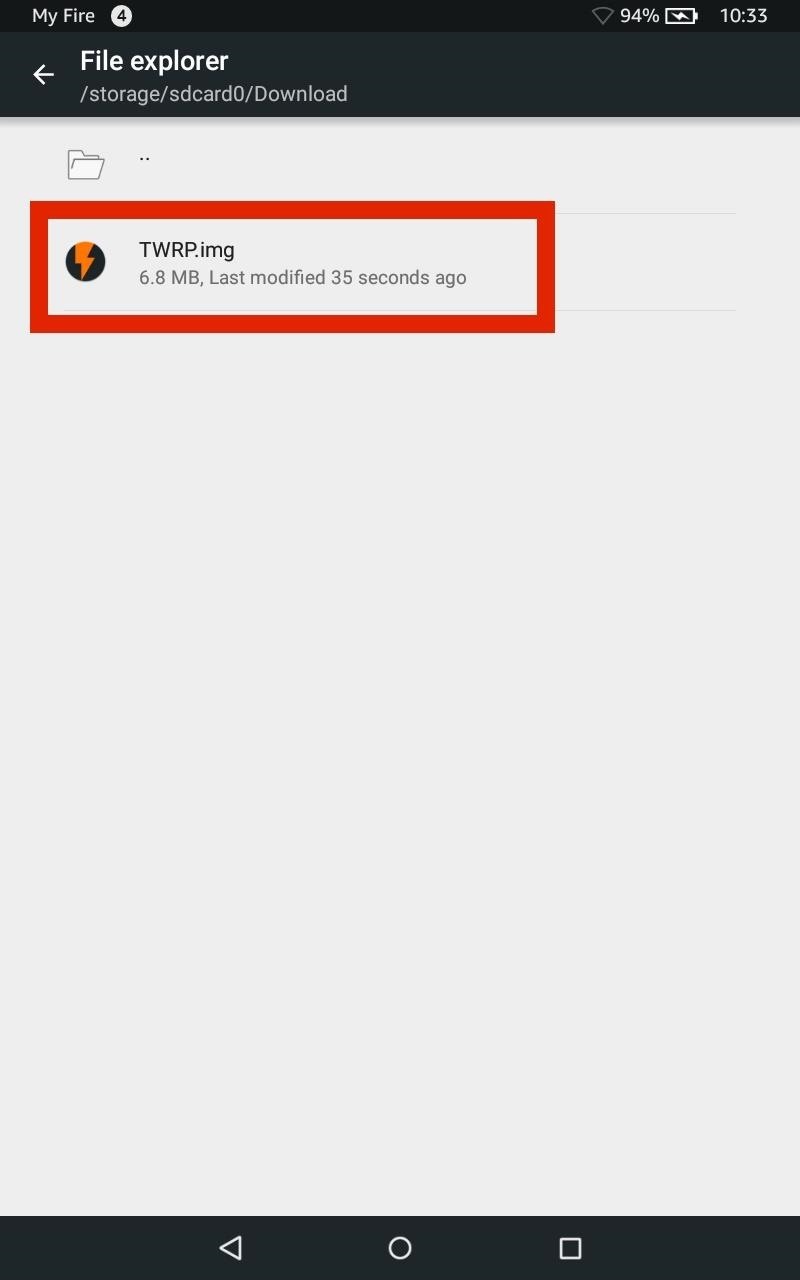
After it's downloaded, open Flashify. Select "Recovery image" from the Flash menu, then choose the TWRP image you just downloaded, which should be in your Download folder.
Step 10: Double-Check Everything
After the flash is completed, enter the ADB command adb reboot recovery to make sure TWRP installed successfully on your tablet. When you see the TWRP menu, you'll know everything was done properly and you will now have a rooted Fire HD 7 with TWRP installed.
With root access and TWRP, you will be able to install a custom ROM, the Xposed Framework, and hundreds of other mods to bring out the full potential of your Amazon Fire HD 7.
Follow Android Hacks over on Facebook and Twitter, or Gadget Hacks over on Facebook, Google+, and Twitter, for more Android tips.
Just updated your iPhone? You'll find new emoji, enhanced security, podcast transcripts, Apple Cash virtual numbers, and other useful features. There are even new additions hidden within Safari. Find out what's new and changed on your iPhone with the iOS 17.4 update.


4 Comments
Never mind. :P
It's a nice tricks for hack amazon fire .
how do i opt my fire tablet to be eligible for the fire os 5 beta? I hit that link, but I do not see anything on that site that says opt my fire tablet? Please help!!!
Step 5.2 has changed apparently. There is no longer an option to opt to be eligible for Fire OS 5 beta on the linked page.
Is there an alternative method, or are we just fucked by Amazon?
Share Your Thoughts